Showing posts with label Captains and Kings.. Show all posts

Monday, July 31, 2017

Lagertha and the Shield Maidens

I'm always on the look-out for somewhat different figures to plop into my Viking hordes.  Gorgon Studios, https://gorgon-studios.myshopify.com/ has provide Lagertha and some of her shield maidens.  They fit in perfectly with my Wargames Factory and Gripping Beast plastics. They will fit in fine in my units for Two Hour Wargames' "Great Hall Burning" and "Captains and Kings."
Left to right, we have a woman in chain with a sword over her shoulder. The next warrior is wearing a chain tunic under a cape, and also carrying a sword. The third is wearing leather armor and carrying an axe. And finally, our spearwoman, also in leather armor.
There are fine seams along the bottom of the cloth garments, which the figure painter on the site has painted as whip-stitched. It seemed like a fine idea to me! I should point out that I have substituted Wargame Factory's shield so that the figures will blend in more.

And now we have Lagertha herself! She's also wearing leather armor and sporting a sword.

The hair of all the figures is obviously influenced by television's "The Vikings".  This is better than giving them all 44DDD busts as a way to identify them as women. The figures with sword will all be added to the ranks of the huscarls.  The two without swords will be added to the bondi.  And here are some Gripping Beast bondi!
I've pretty well said everything about these figures that I have to say, except to repeat that they are easy to assemble and fun to paint.

Here's a comparison photo.


Sunday, September 25, 2016

The Wounding of Egbert the Eveready by Ase the Average

     I finally have just enough Vikings and Saxons to put on a battle between 2 persons of Medium Social Standing in Two Hour Wargames Captains and Kings. So without further ado, let's introduce the two sides.  First is Egbert's retinue. All the figures are Wargames Factory.

And now, Ase's retinue. The hirdsmen and thralls are Wargames Factory. The Freemen are Gripping Beast Dark Age Warrior plastics, and the berserkers are Old Glory, Hasslefree, and Wargames Factory.
Egbert was anxious to get at the Vikings, so he moved forward quickly.  The Vikings proved no pikers, and ran at the Saxons, breaking their formation. They were unable to close, and the beserkers ended up short of the bows, who sent arrows their way.
As the archers' fire was having a bad effect on the beserkers, Egbert moved his troops behind them. The beserkers lost one figure to the arrows, but 2 more fled. Some berserkers.

The archers ran to the left flank of Egbert's retinue, knowing they were no match for anyone with a shield and melee weapon.  Egbert charged the remaining two berserkers, and slew them, though he lost a man in the process.
The Saxon Weak Fyrd charged the Viking Freeman, probably not a wise decision, but they are Ferocious. The Saxons lose a figure, and 2 more run away. The Vikings, of course, lost a single figure.
The Saxon Quality Fyrd charge the Viking Thralls, and lose 2 to the Viking 1.  Things are not going so well for the Saxons.
The Viking Thrall continue their melee with the Saxon Quality Fyrd, and come off best again, with 3 Saxon casualties to their one. The Viking Freemen continue the carnage on the Weak Fyrd. Ase finally gets his hirdsmen into the Saxon thegns. The Saxons lose two to one, but one of theirs is Egbert himself, wounded and out of the battle, regardless of what it says in the picture below.  This brings all advance from the Saxons to a halt, but none break.
The Saxon Weak Fyrd are destroyed, but the Viking Freemen turn tail and run.
The Viking hirdsmen and Saxon Thegns continue their fight with equal casualties. The Quality Fyrd fare poorly against the Viking Thralls.
The Quality Fyrd and the Viking Thralls continue to trade blows with equal effect.  The Saxon bows move to the Viking right flank.
The Thralls wipe out the Quality Fyrd, but the Saxon bows now have no reason not to shoot at the Thralls, and kill 2.  The rest run!
In what was the center, the hirdsmen continue to deal damage to the thegns, but their nerve also breaks, and the remaining Vikings run!
The Saxons win the day with 2 thegns and 8 bowmen.  

In Conclusion:

I gave the berserkers Rep 5 AC 2, Ferocious.

I forgot to roll for Egbert. He was wounded and not killed. If a melee unit causes an enemy unit to run, they pursue.  In both cases here, the Viking units destroyed the units, and had to take the in melee test. Both were below half, and both failed by 1d6 and routed.The Saxon thegns could have pursued the Vikings, but with only 2 figures against 5, it wouldn't have been wise.

A work about the figures.  I've been building Wargames Factory for a while.  I like the separate arms and weapons. The Gripping Beast Dark Age Warriors are ok.  They only have 5 different figures, two of whom seem to be hunched over with appendix attacks. You must carefully consider what heads you put on those figures, or the shields will come nowhere near the figure's left hand, and will have to be glued to the beard and skirt of the figure.  The GB figures are a little crude, with only pouches on one figure. The shields are not to the standard of most others, having no fasteners to hold the edge binding on. There are heat cracks, quite small, on the backs of some. There are no helmeted heads, and only one head with a fur-lined cap.  There are none of the Phrygian caps, though they are shown on the box art.

The Wargames Factory spears are weak.  I am now using plastic broomstraws in their place.  They must be superguled in. Solvent glues won't work. All things said, I far prefer them over the Gripping Dark Age Warriors.  Gripping Beast Thegns are fine, and of a higher quality.

Thursday, April 23, 2015

Have at them! Captains and Kings and the War of the Roses...

I decided to have another go with my War of the Roses retinues.  Unfortunately for the poor figures, the dice gods were unkind on the Leader rolls!

Sir Blue's Foot Knights were led by Sir Red himself a Rep 5 leader.  His men-at-arms were led by a Rep 3, which would effect them mightily on activation, and his bow were led by a Rep 4.

Sir Red was not so lucky.  He was a Rep 4, his men-at-arms with a Rep 3 leader, as were his bows!

The lined up across the field with the bows in front and the knights and men-at-arms trailing them.

On turn 1 only Sir Blue's men were able to activate, and they advanced.
Turn 2 saw both retinues advance. Sir Blue's bows and men-at-arms were slowed by the sand pit.
Turn 3 saw Sir Red activate first and move his men forward.  Sir Red's bows were now in range of Sir Blue's, and they loosed a fusilade, bringing down 1 bowman. It has no effect on the red bow's morale.
In turn 4, the bows exchange fire with no losses, but the Blue bowmen don't like it and 1 figure leaves. (I decided for photo purposes to show the figure bolting, but they are actually removed from the field).
Turn 5, Sir Blue's knights interpenetrate his bows, preventing them from firing or moving.  His men-at-arms, no longer under his leadership, stand around. (Note that I forgot all about Fast Move for the entire game.  Sir Red's knight loose and a Blue knight goes down!
Turn 6. The Blue knights charge the bows.  Their leader has enough sense not to challenge a knight to single combat, but, flustered, they do not fire!  The knights kill 4 bowmen, including their leader, but they hold, though losing another figure to morale.  The bows have no choice but to continue the melee and they are wiped out! Sir Blue, reduced in numbers, now finds himself face to face with Sir Red! Sir Red's men-at-arms advance on Sir Blue's bows, who do no damage.

I should point out that at the beginning of each round of melee, a figure is removed from each unit in melee, so there is on-going attrition.  The only time this does not apply is when one unit is down to its last figure. These figures are not mentioned in my commentary.

Turn 7. Sir Blue has no choice but to charge, hoping his extra die for Ferocious charging will even things out.  It does, but no one dies, and both Carry On. The Blue activation die was a 5, so no one else can activate. Sir Red continues the melee against Sir Blue, killing 1 knight. Both Carry On. 

Sir Red's men-at-arms charge Sir Blue's bows who get off a shot, taking no one down, but causing 1 runaway. The men-at-arms knock down 2 bowmen.  Both Carry On, but 1 man-at-arms runs away.
Turn 8 Sir Red's men cannot activate, including himself! Sir Blue's knights continue the melee with no results. The bows continue to melee the men-at-arms, with little result, but 1 man-at-arms runs away.
Turn 9. Sir Blue dies! Both his remaining units pass their Leader Down test. One of Sir Red's knights has had enough!  Sir Blue's bows finish off the men-at-arms. Sir Red's knights advance.
Turn 10,  The Blue bows take out 2 knights!  The Blue men-at-arms change facing to get around their bows.
Turn 11.  Sir Red charges the bows, who fire to no effect.  Sir Red takes out 3 bows.  They rout, and so does he, leaving the untouched Blue men-at-arms masters of the field!
So quite a different result this time.  Sir Blue's knights suffered too many casualties fighting Sir Red's bows to be able to go one-on-one with Sir Red's knights.  I haven't had both units rout at the end of a melee before this, and forgot that the men-at-arms should have rolled 

.

Friday, April 17, 2015

War of the Roses via Captains and Kings


Ed Teixeira of Two Hour Wargames published Captains and Kings in September of 2014.  It replaces Montjoie!, and was awaited with baited breath by yours truly.  Unfortunately, I didn't have quite enough of anything painted to give a try.  So I started spasmodically working on Saxons, but then remembered that I had bought 350+ primed and based War of the Roses figures a couple of years ago, for the proverbial song.

Retinues for each side were as follows:
7 foot knights Armor Class 6, Reputation 5, move 4". The overall leader is in this unit.
8 men-at-arms, AC4, Rep 4, move 6"
12 bowmen AC4, Rep 4, move 8"
Since the scale is 3 - 5 figures each, this equals 35 knights, 40 men-at-arms, and 60 bowmen at the outside.
I had made the bowmen Dual Armed instead of Missile, but didn't use it.  I've since realized that they should have stayed Missile.

The Reps of the units are pre-determined by their class, but the Rep of the leader of each unit is diced for. Oddly, all but one unit of men-at-arms had Rep 5 leaders.  The unlucky men-at-arms had a Rep 4 leader.

Here is the initial setup.  Some pictures aren't well-focused.  I'm still learning my new camera. Sigh.
The men-at-arms at the bottom right have the Rep 4 leader.  Everyone else has a Rep 5 leader.

Turn 1:
     All figures on both sides advance at the knights' rate of 4", so that the units will remain in base-to-base contact in order to be activated by the overall leader.  Hereafter, the unit on the left will be known as Sir Rojasblau, and the unit on the right as Sir Weissrot, the colors of their liveries.  The knights are in the place of honor, the right of their respective lines.  The knights and men-at-arms are in "mob" and the bows in "line" so they all have line-of-sight to fire.

Turn 2:
Sir Rojasblau wins the toss, and advances his line 3" to stay out of Sir Weissrot's bow range.

Turn 3:
Goes to Sir Rojasblau, who uses his command to advance the knights and men-at-arms, and let his bows fire!  They knock out 2 of the opposing bowmen, who carry on.
Sir Weissrot's knights charge their opposing men-at-arms.  The leaders face off, but do not hurt each other.  However, a total of 2 men-at-arms fall. All carry on.  Sir Weissrot's men-at-arms are slowed bythe hill they are on.  His bows knock out 1 opposing bowman, and another leaves due to morale.
Turn 4:
goes to Sir Rojasblau, who is so slow he can't charge the men-at-arms on the hill. His bows do no damage.  Sir Weissrot's knights and Sir Rojasblau's men-at-arms continue their melee, much to the detriment of the men-at-arms, who are now below half, and leave the field.
Sir Weissrot's bows return fire, and kill the opposing leader, but they carry on!
The men-at-arms charge Sir Rojasblau's knights and lose a total of 3 figures for their effort, including their leader, but they hold!

Turn 5:
finally goes to Sir Weissrot, whose's knights perform a slow-motion wheel to come to bear on Sir Rojasblau's bows. who fire to little effect, thoug one opposing bowman remembers he left the kettle brewing and leaves to check on it.  Sir Weissrot's men-at-arms pause, lose 4 in melee and rout!

Turn 6:
Sir Rojasblau has gained the upper hand. He slowly changes fronts to threaten Sir Weissrot's bow.
His bows fire to little effect, but an enemy bowman also remembers his kettle and bolts!
Sir Weissrot charges the bows, who don't get off a shot, and lose a total of 5, but carry on.

Turns 7, 8 & 9 consist of both sets of knights grinding down the bows until they rout, leaving Sir Rojasblau with 3 knights still on the field, and Sir Weissrot with 2.  They are quite far from one another, so I ended the game with Sir Weissrot surrendering the field.
What did I learn?

Use the bows superior movement to keep them out of melee.

 I forgot about the ability of the line formation to move backwards at full rate, and their ability to interpenetrate the other formations and vice versa.

A much better formation would be bow in front with men-at-arms and knights behind them.

Don't melee knights unless they have been somehow reduced in number.
That Armor of 6 is a killer!

Perhaps I need to reduce the knights to 6 figures.

So, very enjoyable for a first game, but I have a bit to learn! 

Sunday, January 25, 2015

This week's finished figures

Since I'm not getting any game in, I decided to show the figures that I have finished painting this week. Click on the pics for larger versions.

First up are some Colonial Police from Brigades Games in the USA.  These are older figures, and are a bit crude.  The faces are caricaturish.  First I painted them to resemble the Nassau police.  The sun helmets have no indication of the 6 seams that comprise the cover, so those were painted with a brown wash and a tiny brush.  I wanted these guys to be pristine, so no wash was added to their paint.  The white was dry-brushed up from ivory, but that's about it.  The belts and shoes were glossed, since policemen are very proud of their appearance.
Then I did the same figures in khaki, with my usual wash.
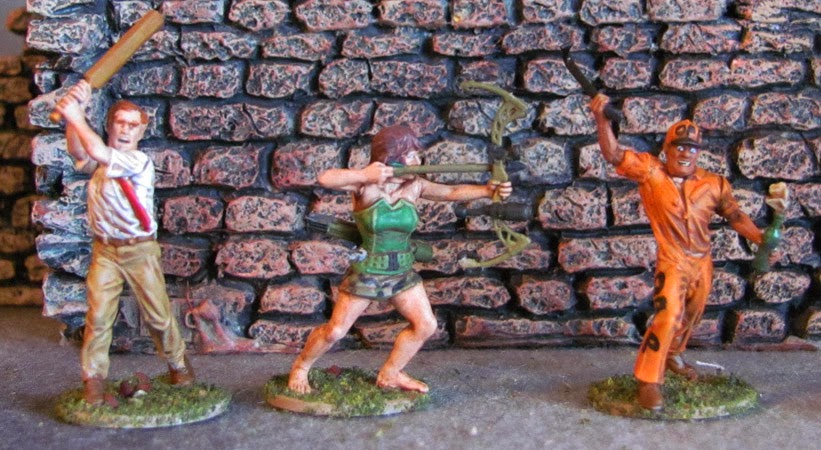
Next up are men and women survivors from Wargames Factory.  I'm not thrilled with these figures due to the need to fill the joints between the arms and torsos.  I don't quite get the girl with the compound bow, bustier, and mini-skirt.  The figure in orange is an escaped prisoner from a work detail of the Orleans Parish Prison, hence the OPP.  And we can't do without Shaun of the Dead!
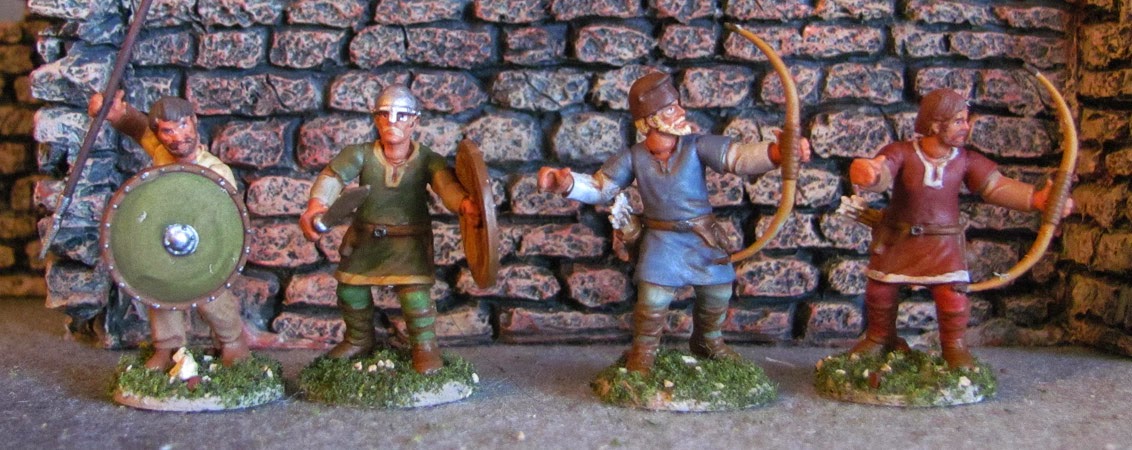
These are Wargames Factory Saxon Fyrd.  Of course, after assembling these about 6 months ago, I learned that these poor slobs would not have any helmets.  The other 24 are being assembled correctly.  I use Ambroid liquid cement to assemble these figures, and a little squishing around fills the small gaps between the arms and the torso.  I use a small ball-shaped grinder with my moto-tool to expand the necks so that the heads fit with little fiddling.  Once again, a little squishing with Ambroid seems to fill any gaps.

And I finish up with a few more figures from Wargames Factory male survivors.  The kid had the scope clipped off his rifle, because I don't think he would have sniper skills.
That's it 'til next time.  All comments are appreciated!