Monday, July 13, 2015

Modifying Fat Dragon Games' Borderline Keep tower as a stand-alone piece.

I recently decided that I needed a stand-alone tower with a basic interior for gaming purposes.  Searching through my paper models, I found that Fat Dragon Games http://www.fatdragongames.com/fdgfiles/ Borderline Keep had a tower that was about 5 " square and should do admirably.

Since the tower sides are symetrical, I just printed each side twice for the exterior and interior.
Of course the hardest part was the crennellated top.  I glued this to heavy comic book or scrapbooking paper I got on line. And I used the same paper to support the floor.
Here's a photo of the completed tower.

Although it is not immediately apparent, the crenellated upper story lifts off as does the story with the arrows slots..
Here's the underneath of the tower top.

The second floor was strengthened with black foamcore.  It cuts so much better than the white foamcore, without the great gouts of foam pulling out as you cut. The red is to help locate its position on the first floor, since I'm not perfect and the pieces fit together better in a certain way.  This floor, and the ground floor are from Model Builder.
Here's a bottom view.  I had to add a double floor with spacers to get the figures to the right height versus the arrow slots, which I did not cut out. There are two locators made from the black foamcore.
And the interior of the ground floor.  Since the door is not impenetrable, I added a murder hole, created in Model Builder.
Was it fiddley? Yes! Is it perfect? No.  Am I happy with it? Yes.  It will do well in the game it is intended for. This is just a little advice on how to convert a quick build tower with no access to its interior into a playable tower with 3 floors.

Friday, May 8, 2015

SAGA Irish Warband from Gripping Beast.

As always, from Gripping Beast, these are well produced figures.  They're easy to paint.  A caveat, however.  The hearthguard don't match the options listed in The Raven's Shadow.  They should have either javelins or Dane axes.  There are 4 Dane axes included, but no figures properly configured to hold them with the shields on their back.

So here they are are, and a few comments on painting, etc..
This is the warlord, my least favorite figure in the box.  He's too squinched up for my taste.  Also, I couldn't get his sword to hold with super glue.  It got knocked off 4 times on the painting table. The last time it disappeared, and was replaced with a Dane ax, so he's lost his sword.  His two "companions" are from Crusader Miniatures' Gallic Women Warriors.

These are my hearthguard.  As you can easily see, I don't go for fancy shields.  The figures are great, and many of the weapons are molded with the hand, and plug into end of the right arm, a very strong attachment! (Wish they'd done the same for the warlord)  I did a little research on Irish textiles of the Dark Ages, and found varied colors and patterns.  Of course, they are brighter than the warriors. Eye color, and some of the plaids were done with Pigma Micron Pens, specifically the 005 ones.
And the warriors.  The dogs were easy and fun to paint.  The hound master has a light javelin added from florist wire.  His pose just didn't look right without something in his left hand.

They haven't been blooded yet.

Thursday, April 23, 2015

Have at them! Captains and Kings and the War of the Roses...

I decided to have another go with my War of the Roses retinues.  Unfortunately for the poor figures, the dice gods were unkind on the Leader rolls!

Sir Blue's Foot Knights were led by Sir Red himself a Rep 5 leader.  His men-at-arms were led by a Rep 3, which would effect them mightily on activation, and his bow were led by a Rep 4.

Sir Red was not so lucky.  He was a Rep 4, his men-at-arms with a Rep 3 leader, as were his bows!

The lined up across the field with the bows in front and the knights and men-at-arms trailing them.

On turn 1 only Sir Blue's men were able to activate, and they advanced.
Turn 2 saw both retinues advance. Sir Blue's bows and men-at-arms were slowed by the sand pit.
Turn 3 saw Sir Red activate first and move his men forward.  Sir Red's bows were now in range of Sir Blue's, and they loosed a fusilade, bringing down 1 bowman. It has no effect on the red bow's morale.
In turn 4, the bows exchange fire with no losses, but the Blue bowmen don't like it and 1 figure leaves. (I decided for photo purposes to show the figure bolting, but they are actually removed from the field).
Turn 5, Sir Blue's knights interpenetrate his bows, preventing them from firing or moving.  His men-at-arms, no longer under his leadership, stand around. (Note that I forgot all about Fast Move for the entire game.  Sir Red's knight loose and a Blue knight goes down!
Turn 6. The Blue knights charge the bows.  Their leader has enough sense not to challenge a knight to single combat, but, flustered, they do not fire!  The knights kill 4 bowmen, including their leader, but they hold, though losing another figure to morale.  The bows have no choice but to continue the melee and they are wiped out! Sir Blue, reduced in numbers, now finds himself face to face with Sir Red! Sir Red's men-at-arms advance on Sir Blue's bows, who do no damage.

I should point out that at the beginning of each round of melee, a figure is removed from each unit in melee, so there is on-going attrition.  The only time this does not apply is when one unit is down to its last figure. These figures are not mentioned in my commentary.

Turn 7. Sir Blue has no choice but to charge, hoping his extra die for Ferocious charging will even things out.  It does, but no one dies, and both Carry On. The Blue activation die was a 5, so no one else can activate. Sir Red continues the melee against Sir Blue, killing 1 knight. Both Carry On. 

Sir Red's men-at-arms charge Sir Blue's bows who get off a shot, taking no one down, but causing 1 runaway. The men-at-arms knock down 2 bowmen.  Both Carry On, but 1 man-at-arms runs away.
Turn 8 Sir Red's men cannot activate, including himself! Sir Blue's knights continue the melee with no results. The bows continue to melee the men-at-arms, with little result, but 1 man-at-arms runs away.
Turn 9. Sir Blue dies! Both his remaining units pass their Leader Down test. One of Sir Red's knights has had enough!  Sir Blue's bows finish off the men-at-arms. Sir Red's knights advance.
Turn 10,  The Blue bows take out 2 knights!  The Blue men-at-arms change facing to get around their bows.
Turn 11.  Sir Red charges the bows, who fire to no effect.  Sir Red takes out 3 bows.  They rout, and so does he, leaving the untouched Blue men-at-arms masters of the field!
So quite a different result this time.  Sir Blue's knights suffered too many casualties fighting Sir Red's bows to be able to go one-on-one with Sir Red's knights.  I haven't had both units rout at the end of a melee before this, and forgot that the men-at-arms should have rolled 

.

Friday, April 17, 2015

War of the Roses via Captains and Kings


Ed Teixeira of Two Hour Wargames published Captains and Kings in September of 2014.  It replaces Montjoie!, and was awaited with baited breath by yours truly.  Unfortunately, I didn't have quite enough of anything painted to give a try.  So I started spasmodically working on Saxons, but then remembered that I had bought 350+ primed and based War of the Roses figures a couple of years ago, for the proverbial song.

Retinues for each side were as follows:
7 foot knights Armor Class 6, Reputation 5, move 4". The overall leader is in this unit.
8 men-at-arms, AC4, Rep 4, move 6"
12 bowmen AC4, Rep 4, move 8"
Since the scale is 3 - 5 figures each, this equals 35 knights, 40 men-at-arms, and 60 bowmen at the outside.
I had made the bowmen Dual Armed instead of Missile, but didn't use it.  I've since realized that they should have stayed Missile.

The Reps of the units are pre-determined by their class, but the Rep of the leader of each unit is diced for. Oddly, all but one unit of men-at-arms had Rep 5 leaders.  The unlucky men-at-arms had a Rep 4 leader.

Here is the initial setup.  Some pictures aren't well-focused.  I'm still learning my new camera. Sigh.
The men-at-arms at the bottom right have the Rep 4 leader.  Everyone else has a Rep 5 leader.

Turn 1:
     All figures on both sides advance at the knights' rate of 4", so that the units will remain in base-to-base contact in order to be activated by the overall leader.  Hereafter, the unit on the left will be known as Sir Rojasblau, and the unit on the right as Sir Weissrot, the colors of their liveries.  The knights are in the place of honor, the right of their respective lines.  The knights and men-at-arms are in "mob" and the bows in "line" so they all have line-of-sight to fire.

Turn 2:
Sir Rojasblau wins the toss, and advances his line 3" to stay out of Sir Weissrot's bow range.

Turn 3:
Goes to Sir Rojasblau, who uses his command to advance the knights and men-at-arms, and let his bows fire!  They knock out 2 of the opposing bowmen, who carry on.
Sir Weissrot's knights charge their opposing men-at-arms.  The leaders face off, but do not hurt each other.  However, a total of 2 men-at-arms fall. All carry on.  Sir Weissrot's men-at-arms are slowed bythe hill they are on.  His bows knock out 1 opposing bowman, and another leaves due to morale.
Turn 4:
goes to Sir Rojasblau, who is so slow he can't charge the men-at-arms on the hill. His bows do no damage.  Sir Weissrot's knights and Sir Rojasblau's men-at-arms continue their melee, much to the detriment of the men-at-arms, who are now below half, and leave the field.
Sir Weissrot's bows return fire, and kill the opposing leader, but they carry on!
The men-at-arms charge Sir Rojasblau's knights and lose a total of 3 figures for their effort, including their leader, but they hold!

Turn 5:
finally goes to Sir Weissrot, whose's knights perform a slow-motion wheel to come to bear on Sir Rojasblau's bows. who fire to little effect, thoug one opposing bowman remembers he left the kettle brewing and leaves to check on it.  Sir Weissrot's men-at-arms pause, lose 4 in melee and rout!

Turn 6:
Sir Rojasblau has gained the upper hand. He slowly changes fronts to threaten Sir Weissrot's bow.
His bows fire to little effect, but an enemy bowman also remembers his kettle and bolts!
Sir Weissrot charges the bows, who don't get off a shot, and lose a total of 5, but carry on.

Turns 7, 8 & 9 consist of both sets of knights grinding down the bows until they rout, leaving Sir Rojasblau with 3 knights still on the field, and Sir Weissrot with 2.  They are quite far from one another, so I ended the game with Sir Weissrot surrendering the field.
What did I learn?

Use the bows superior movement to keep them out of melee.

 I forgot about the ability of the line formation to move backwards at full rate, and their ability to interpenetrate the other formations and vice versa.

A much better formation would be bow in front with men-at-arms and knights behind them.

Don't melee knights unless they have been somehow reduced in number.
That Armor of 6 is a killer!

Perhaps I need to reduce the knights to 6 figures.

So, very enjoyable for a first game, but I have a bit to learn! 

Sunday, January 25, 2015

This week's finished figures

Since I'm not getting any game in, I decided to show the figures that I have finished painting this week. Click on the pics for larger versions.

First up are some Colonial Police from Brigades Games in the USA.  These are older figures, and are a bit crude.  The faces are caricaturish.  First I painted them to resemble the Nassau police.  The sun helmets have no indication of the 6 seams that comprise the cover, so those were painted with a brown wash and a tiny brush.  I wanted these guys to be pristine, so no wash was added to their paint.  The white was dry-brushed up from ivory, but that's about it.  The belts and shoes were glossed, since policemen are very proud of their appearance.
Then I did the same figures in khaki, with my usual wash.
Next up are men and women survivors from Wargames Factory.  I'm not thrilled with these figures due to the need to fill the joints between the arms and torsos.  I don't quite get the girl with the compound bow, bustier, and mini-skirt.  The figure in orange is an escaped prisoner from a work detail of the Orleans Parish Prison, hence the OPP.  And we can't do without Shaun of the Dead!
These are Wargames Factory Saxon Fyrd.  Of course, after assembling these about 6 months ago, I learned that these poor slobs would not have any helmets.  The other 24 are being assembled correctly.  I use Ambroid liquid cement to assemble these figures, and a little squishing around fills the small gaps between the arms and the torso.  I use a small ball-shaped grinder with my moto-tool to expand the necks so that the heads fit with little fiddling.  Once again, a little squishing with Ambroid seems to fill any gaps.

And I finish up with a few more figures from Wargames Factory male survivors.  The kid had the scope clipped off his rifle, because I don't think he would have sniper skills.
That's it 'til next time.  All comments are appreciated!

Tuesday, November 11, 2014

Colonial Barracks 2014

Due to the nature of my job, I was only able to attend a little while on Friday morning, missed the entire afternoon session, and returned to play in Jim Pitt's game, "Marines in the Forest" using The Sword to Adventure.  I actually managed to be on the winning side in a French and Indian War scenario.

For those who don't know, Colonial Battles is in honor of Larry Brom, who published The Sword and The Flame 35 years ago.  It is still going strong, with many different rule sets being published today by Sergeants 3.  All games are run with variants of The Sword and The Flame, encompassing ancients to science fiction, and many in between.  Unfortunately, Larry's health didn't allow him to attend this year, but his daughters, Christie (a.k.a. "Skittles") and Lori ably handled the con.

Saturday started at 3am, when my Mom was taken to the hospital.  It turned out to be missing a particular prescription, and so ended well.

At 9am, I played in Mark Fluitt's game "Roman Legionnaires in Germania" using The Sword In Gaul.  Roman scum had desecrated our holy tree and taken our Druid captive for "questioning".  We Germans were spread out about the table, trying to stop the Romans.  Mark was awarded The Gunny Award for Most Striking  Terrain, and believe me, it was beautiful, as were the figures.  Here are the few pictures I managed to take between rolling dice and moving troops.
My Germans advance against Mark Stevens' Romans.  The red marker in the woods was a hidden unit whom I activated later in the game.
We begin to push the Romans back.  This red marker was a unit I was never able to activate. Ron Gros, whose hands are visible in the back\ground, held the Roman rearguard, making them forget that getting off the table with the Druid was the Roman goal.
Tom Anderson's gorgeous cavalry unfortunately proved to be male models with no desire to fight, and failed to close. His infantry, however, were made of sterned stuff!  We held to Romans to a draw.

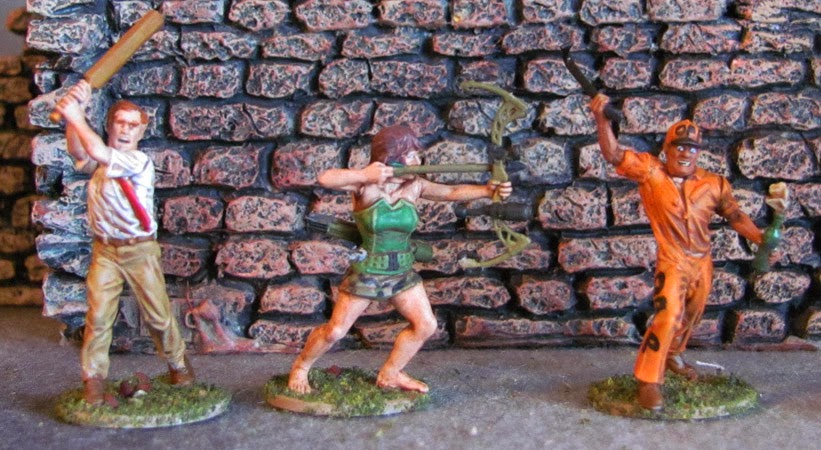
Now my afternoon game, "The Post" using With Ol' Gimlet Eye.  First let me affirm what gentlemen were in my game.  I made the mistake of "assuming" that the game was in usual Larry Brom style of d6's and d20's.  It was not: it was all d10's, which wasn't discovered until about 2'1/2 hours into the game.  Not a gamer complained, though I received definitely deserved ribbing.  Bill Hamilton came through as my hero pointing out that everyone was familiar with Larry's games, and no one caught it until well into the game.  I apologized and the game continued with d10's.

Here's a picture of the table before the game started.  The beautifully finished Sarissa buildings belong to Chris Swearingen and were the goal of the game.  The Sandinistas needed to burn the post.
Early on, the US Marines troop up the road, and arrive at the gate to the enclosure.

Things began to warm up as the post owners were forced to try to hold off the Sandinistas moments before the Marines arrived.
The Marines began flooding in!  At the top of the pictures are Jim Pitt's Sandanistas who had no interest in getting into the fight.


The Marines have moved in, and the firing gets hot and heavy!  Some Sandanistas managed to get over the wall, but were eventually repelled.

The original post defenders lived through the game, probably because they were not much of a threat, being only 5, and poorly armed.
Mark Stevens (Gunny for Most Exquisitely Painted Figures, with I most wholeheartedly agree) checking the rules as I listened to Bill Hamilton's hands!
Mark Stevens, Jim Pitts, and Bill Hamilton consider a point in firing.
What?? D10's?? On, nooooo!

In the end, after the Sandanistas were repelled from the village, it was decided that they had no chance to burn the post, and so lost.  I really enjoyed running it, even with my gross mistake.

At the same time, Jay Stribling was running his Frogs In Space! game, "In a Galaxy Far Away..."  You could see that it wasn't going to be Games Workshop from the beginning!

Here's the svelte Jay Stribling with his head down like a good GM.  He was awarded the Gunny for Most Affable Game Master, and Most Enjoyable Scenario!
Unfortunately, I didn't get to see a single thing, since that's the back of my head running my game.
More goodness.  Ron Gross told me he loved the game, but Jay is not ready to release it yet.
Tom Anderson, my cohort in Germania, also ran his game "Sebonek Nek" with The Sword And The Flame.  Once again, I got to see none of it. I did lust after all his Ral Parthas!

Dwight Jones,"The Cattle Raid" using The Sword In Africa, my favorite variant, had a great table! I now have cattle envy! Dwight makes excellent terrain.  I have 30 of his serpentine fences and a great pig pen. (can't resist pig pens somehow)


Terry Sofian (Gunny for Most Hollywood-like Game) ran his variant, The Hive And The Flame, and has a very impressive table.


Here are Christie (Skittles) and Lori Brom, the convention organizers, with Mark Fluitt, searching through the hundreds of Staddens that Terry Sofian brought.  I was not immune myself.
And here is Ron Gros, who ably kept the rear guard of the Romans from adding their weight to the attack to get off the table.
I had a great time, playing and rubbing shoulders with old friends.  Unfortunately, I ran out of steam due to my early morning, and was unable to stay for the evening games, and work called on Sunday, so I was unable to return.  sigh.  The things we do for a buck!

I then found out that I had been awarded the Gunny for Most Congenial Player.  Great honor, and I am very appreciative, since the awards are giving by the voting attendees.